

Getting Started Using a Stand Mixer Food Grinder Attachment
release time:
2024-01-16
Step 1: Assembling the New Stand Mixer Food Grinder Attachment
To start using your new stand mixer food grinder attachment, you need to assemble it properly. Begin by attaching the food grinder to the power hub of your stand mixer. Secure it tightly and ensure that it is properly aligned.
Step 2: Preparing the Stand Mixer and Ingredients
Before you begin grinding or making any culinary creations, it's essential to prepare your stand mixer and ingredients. Make sure your stand mixer is clean and in good working condition. As for the ingredients, ensure they are fresh and properly chilled or at room temperature, depending on the recipe.
Step 3: Grinding Meat with the New Stand Mixer Food Grinder Attachment
4.1 Choosing the Right Cuts of Meat
For optimal results, choose high-quality cuts of meat with the right amount of fat content. Lean cuts may result in dry and less flavorful ground meat. Consider using cuts like chuck, sirloin, or even a combination of different cuts to achieve the desired texture and taste.
4.2 Preparing the Meat for Grinding
Before grinding the meat, it's crucial to trim off any excess fat, sinew, or connective tissue. Cut the meat into small cubes or strips that easily fit into the food grinder's feeding tray. Keep the meat chilled during the preparation process to maintain its freshness.
4.3 Grinding the Meat
Attach the new stand mixer food grinder attachment to your stand mixer and turn it on to the desired speed setting. Start feeding the prepared meat into the grinder slowly, using the provided pusher to guide it into the grinding mechanism. Collect the ground meat in a bowl or container as it comes out of the grinder. Remember to work efficiently to minimize the time the meat spends outside the refrigerator.
Step 4: Making Fresh Sausages
5.1 Selecting the Right Sausage Casings
When making sausages, choosing suitable casings is crucial. Natural casings, such as hog or sheep casings, provide a traditional and authentic touch to your homemade sausages. Alternatively, you can opt for collagen casings for a more convenient and ready-to-use option.
5.2 Preparing the Sausage Mixture
Prepare your sausage mixture by combining the ground meat with your desired seasonings and spices. Use a recipe or experiment with flavors to create unique sausage blends. Ensure the mixture is evenly combined before proceeding to the next step.
5.3 Stuffing the Sausage Casings
Attach the sausage stuffer attachment to your new stand mixer food grinder. Fill the casing with the sausage mixture, ensuring there are no air pockets. Twist or tie the sausages at desired intervals to create individual links. With practice, you'll perfect the art of sausage making.
Step 5: Creating Homemade Burger Patties
6.1 Selecting the Ideal Meat Blend
For delicious homemade burger patties, choose a meat blend that offers the desired taste and texture. Blend different cuts of meat to achieve the perfect balance of flavors and fat content. Experiment with ratios until you find your preferred combination.
6.2 Mixing the Ingredients
In a mixing bowl, combine the ground meat with your preferred seasonings and any additional ingredients, such as onions or breadcrumbs. Mix the ingredients thoroughly, ensuring an even distribution of flavors.
6.3 Shaping the Burger Patties
Divide the mixture into equal portions and shape them into patties using your hands or a burger patty press. Ensure that the patties are of consistent thickness for even cooking. Place the patties on a plate or tray lined with parchment paper and refrigerate them for at least 30 minutes before grilling or cooking.
Step 6: Grinding Ingredients for Homemade Baby Food
7.1 Choosing Suitable Ingredients
When making homemade baby food, opt for fresh and organic ingredients whenever possible. Ensure that the ingredients are age-appropriate and suitable for your baby's dietary needs.
7.2 Preparing the Ingredients
Clean and peel the ingredients as necessary. Cut them into small, manageable pieces to fit into the food grinder attachment easily. Blanch or steam certain ingredients if required before grinding.
7.3 Grinding the Ingredients
Attach the food grinder attachment to your stand mixer and set it to the desired speed. Start feeding the prepared ingredients into the grinder, using the pusher to guide them efficiently. Collect the ground baby food in a bowl or container and store it appropriately.
Step 7: Making Fresh Pasta Dough
8.1 Selecting the Right Flour
Choosing the right type of flour is essential for perfect pasta dough. Opt for durum wheat semolina flour for a traditional and authentic taste. If it's not available, all-purpose flour or a blend of semolina and all-purpose flour can also yield excellent results.
8.2 Mixing and Kneading the Dough
In a mixing bowl, combine the flour and any additional ingredients, such as eggs or water. Mix the ingredients until they form a shaggy dough. Transfer the dough onto a clean and lightly floured surface. Knead the dough until it becomes smooth and elastic, using the heel of your hand to push and fold it.
8.3 Extruding the Pasta Shapes
Attach the pasta roller and cutter attachments to your stand mixer. Divide the dough into smaller portions and flatten them with a rolling pin or pasta roller. Feed the flattened dough through the pasta roller gradually, adjusting the thickness settings as desired. Once you have thin sheets of pasta, pass them through the appropriate cutter attachment to create your desired pasta shapes.
Unleash the full potential of your stand mixer with the food grinder attachment by following this comprehensive guide. From grinding meat to creating homemade sausages, burger patties, baby food, and even fresh pasta dough, this attachment opens up a world of culinary possibilities. Explore different recipes and techniques to enhance your cooking experience and impress your family and friends with your culinary creations. Enjoy the convenience and versatility of your new stand mixer food grinder attachment, and let your creativity shine in the kitchen.
More information

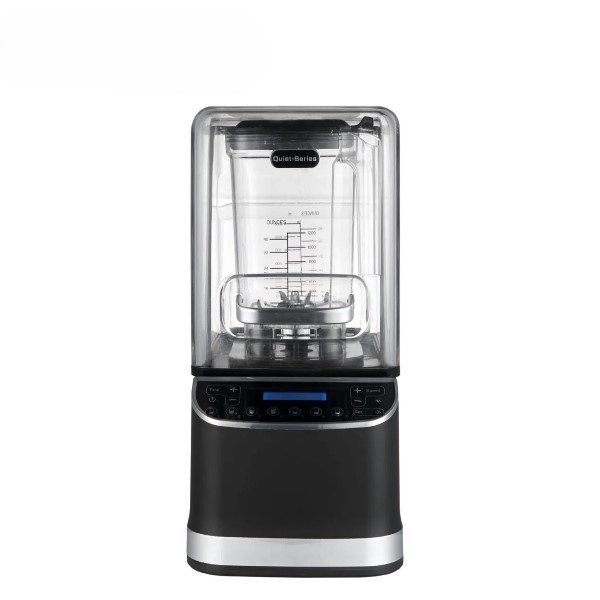



What we are making?
We take times to design, manufacture and launch our products into market carefully, ensure each model is fine crafted, withstand market testing. Our series of commercial blenders, although in compact design to save serving space of bar counter, are built in pure copper motor, power strong up to 3.5HP, combine with wide blades, they are capable of mixing very heavy ingredients including root vegetables and ices into smooth status, and achieve precise creations as you want.
Tel:
E-mail:
Add:
FL 8, BUILDING 20, PHASE 2nd, TONGDE INDUSTRIAL ZONE, RONGGUI, SHUNDE, FOSHAN,GD